Learn how to create and submit brand-funded discount promotions to retailers using the Promotions feature in Dutchie Connect.
Learn how to create and submit brand-funded discount promotions to retailers using the Promotions feature in Dutchie Connect.
Brand-funded promotions allow cannabis brands to propose and fund discounts on their products directly with retail partners. Using the Promotions feature in Dutchie Connect, brand managers can build a promotion from the ground up, specifying the discount structure, funding terms, participating retailers, and the products eligible for the offer.
Once a brand submits a promotion, the participating retailer reviews the proposal in Dutchie Backoffice and can choose to accept or decline. When a retailer accepts, the discount becomes active automatically for the specified duration and products, and it appears in the retailer's discount list alongside their own self-created promotions.
Things to know
- Promotions apply across all sales channels for any consumer at the chosen retailer who meets the eligibility requirements you set.
- You can target promotions at the brand level, category level, or down to specific individual products.
- A retailer who accepts your proposal cannot edit the promotion's terms (such as SKUs, funding amounts, or dates) after acceptance, but they can cancel the promotion at any time.
- The retailer controls whether and how your provided online display content (name, description, and image) appears to their consumers. They may adjust the presentation to fit their menu style.
- Users with access to Dutchie Connect will be able to view brand funded promotions.
Create a promotion
Embed Storylane: https://app.storylane.io/share/1dxl3b67yle6
Step 1: Name and describe the promotion
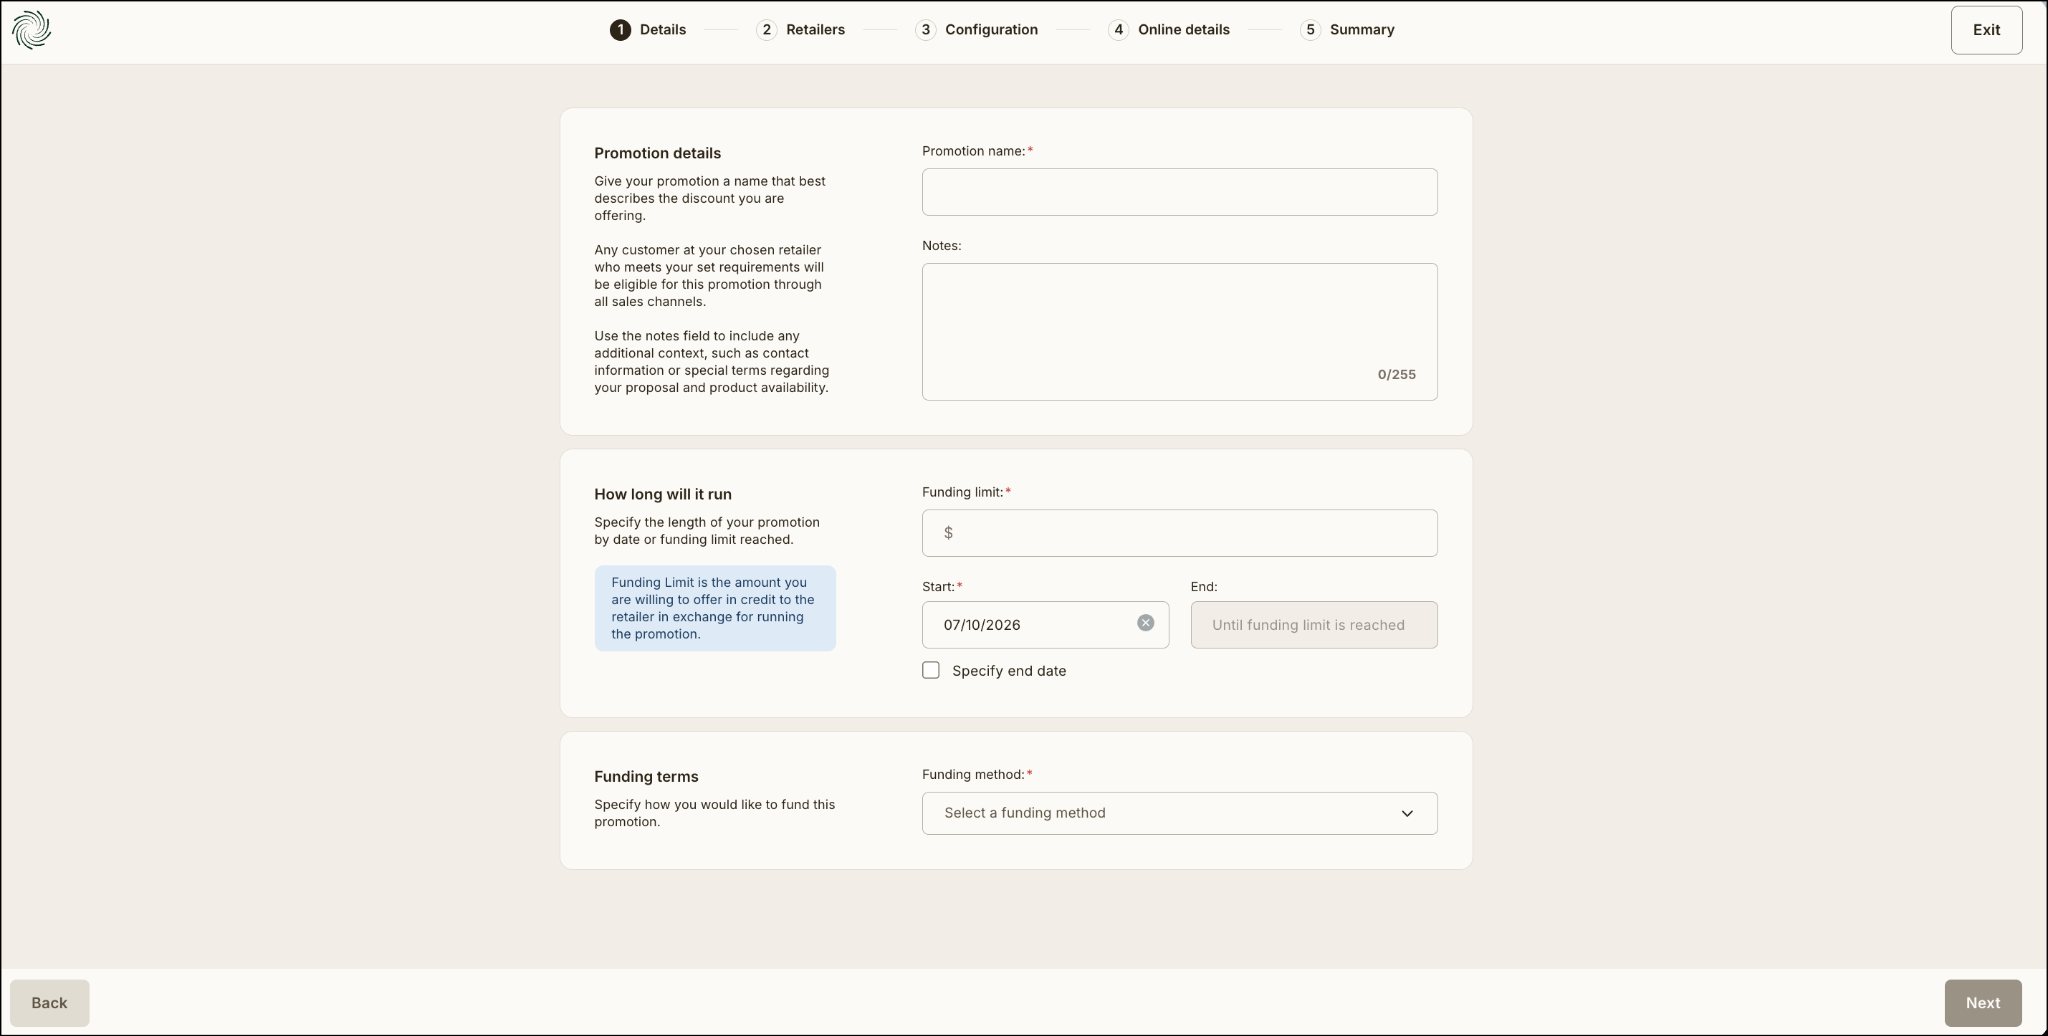
- Log in to Dutchie Connect, and click Promotions in the navigation.
- On the Promotions screen, you will see tabs for scheduled, active, and ended promotions. Click Create a Promotion.
- Enter a Promotion name that clearly describes the discount you are offering.
- Optionally, add Notes about the promotion.
This might include contact information, special terms, or relevant context about product availability. The notes field accepts up to 255 characters.
Step 2: Set funding details and dates
-
Enter a Funding limit for the promotion. This is the total amount of credit you are willing to offer the retailer in exchange for running the discount.
This funding limit is per retail chain. If the user types $1000 and offers the promotion to two retail chains, their total obligation could be as much as $2000.
Each retail chain's funding limit is shared across all its rooftops. If the user offers a discount with a $1000 funding limit to a chain with two stores, redemptions at both stores will accrue against the same $1000 budget.
Set a Start date. You may also specify an End date if you want the promotion to run for a defined period.
-
Select a Funding method from the following options:
Dollars per application Credit the retailer with a set dollar value each time the discount is applied.
Based on register discount: Credit the retailer with a percentage of the discount amount given to the customer for each discounted unit.
Based on wholesale cost: Credit the retailer with a percentage of each discounted unit's wholesale cost. (Wholesale cost is maintained by retailers in their inventory systems
Enter the agreed upon amount associated with your selected funding method.
Click Next.
Step 3: Select retailers
- Select the region where your target retailer operates.
- Click Add a Retailer. You can browse or search for retailers by name.
- Click check boxes next to retailers you wish to include. You can include multiple retailers.
- For each retailer, you can manage which of their locations are included.
- Click Next.
Step 4: Define the discount structure
Choose the discount type that matches the deal you want to offer:
- Percentage off: A percent discount applied to every qualifying item (for example, 20% off all qualifying items).
- Dollar amount off: A flat dollar amount off every qualifying item (for example, $2 off each).
- Buy X, get Y: A quantity-based offer where purchasing a set number of qualifying items unlocks a reward item at a percentage off (for example, buy 2, get 1 at 50% off).
After selecting a discount type:
- Enter the discount value (percentage or dollar amount, depending on your selection).
- Specify the qualifying products by selecting the brand, a category (such as flower), or individual products. You can restrict the promotion to the product level.
- Click Next.
Step 5: Add online details
- Enter an Online name for the promotion. This is how the discount will appear on the retailer's menu to their consumers.
- Add a Description that clearly explains what the discount is and how consumers will see it on the menu..
- Optionally, upload an image to accompany the promotion on the menu.
- Preview how the promotion will appear on the individual specials page and the specials homepage.
Step 6: Review and submit
- Review the summary to confirm all information is correct.
- If you need to make changes, click the Edit link in the top right corner of the relevant section.
- When everything looks correct, click Create. Your promotion has been submitted to the selected retailers for review.
What retailers see after you submit
Once you submit a promotion, the retailer receives it in their Dutchie Backoffice under Marketing > Proposals. From there, they can review the full details of your offer, including funding coverage and limits, included products and current pricing, and participating locations. They can accept or decline the proposal.
If a retailer accepts your promotion, Dutchie automatically creates an active discount in their system for the specified products and duration. The discount appears in the retailer's discount list with a Funding Brand column that identifies it as brand-funded.
Troubleshooting
My promotion was submitted, but the retailer does not see it in their Backoffice. Confirm that the retailer locations you selected during setup are active and that the retailer's account is set up to receive brand-funded proposals. If the issue persists, contact Dutchie Support.
I cannot find my target retailer when searching. Try searching by variations of the retailer's name. Make sure you have selected the correct state before searching. All active retailers should appear once the right state is set. Also double-check the spelling of the business or LSP name you're searching for.
If the retailer hasn't opted in to Connect, the brand funded discount won't be delivered to them. Instead, it will sit as pending in the brand's proposal ledger until the retailer opts in. We're actively working on a way to nudge retailers toward opting in so they can start receiving brand funded discounts from brands.
When a retailer opts in to Connect, they're automatically connected to all brands by default. If they want to disable the connection with specific brands, they'll need to contact support to have that turned off.
The discount calculation looks incorrect in the retailer's proposal view. The Jira source material identifies a known issue where the "Price per unit after discount" calculation may display incorrectly in the proposal review screen. Contact Dutchie Support to report this if your retailer flags an incorrect value.